

In this tutorial we’re going to learn how to create a cool calculator using html css and javascript
🔗Prerequisites


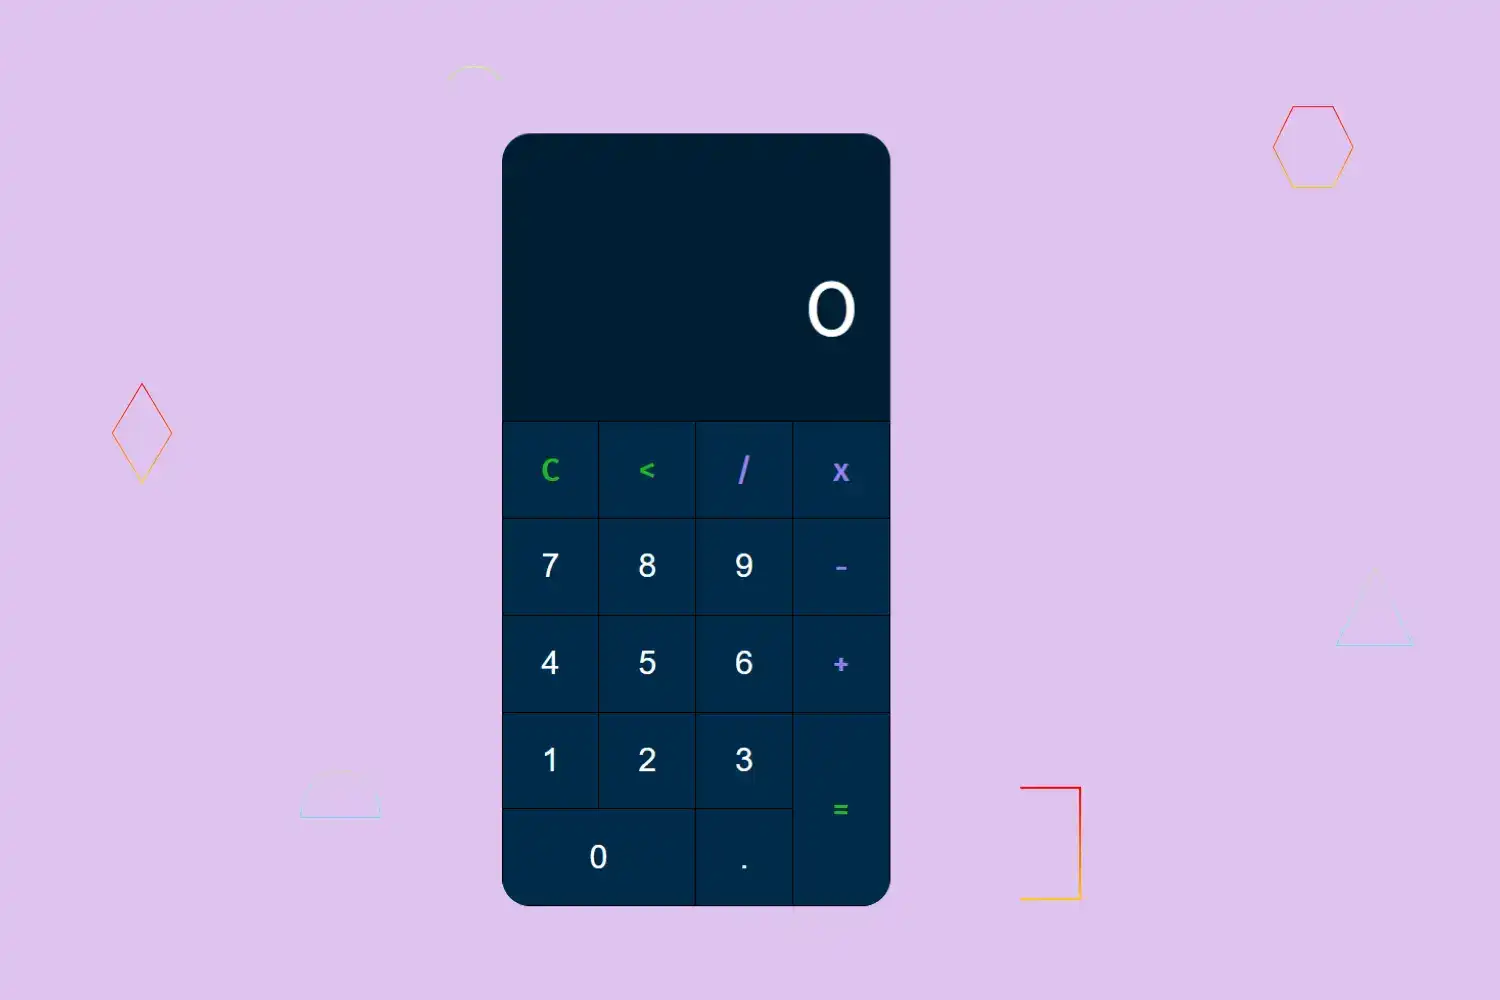
🔗Get started ✌
The calculator we’ll build in this tutorial will be pretty cool. a user can do basic calculation with this like addition , multiplication , division, subtraction and also a use can clear calculation or delete back one number
I’ll step by step explain how to build this project, but you must follow along by typing the code and running it on your end to get the most out of this tutorial
Click here to get starter files
🔗Add google font cdn
We’ll use fira and red hat font family in this project for that we have to include cdn of fira and red hat font google font family
html<linkhref="https://fonts.googleapis.com/css2?family=Red+Hat+Display:wght@500&display=swap"rel="stylesheet"/><linkhref="https://fonts.googleapis.com/css2?family=Fira+Sans:wght@500&display=swap"rel="stylesheet"/>
🔗Building the calculator
The calculator consists of two parts: the screen and the keys
- Screen :- where we’ll show calculation text and result text
- Key :- all keys including Operator keys , Math keys, Number keys


Markup of calculator
html<div class="calculator"><div class="screen"><div class="screenContent"><p class="calculation"><span id="calculationText"></span></p><p class="result"><span id="resultText">0</span></p></div></div></div>
We can use table to make the keys
html<table><tr><td><input class="btn operator" type="button" value="C" /></td><td><input class="btn operator" type="button" value="<" /></td><td><input class="btn math" type="button" value="/" /></td><td><input class="btn math" type="button" value="x" /></td></tr><tr><td><input class="btn" type="button" value="7" /></td><td><input class="btn" type="button" value="8" /></td><td><input class="btn" type="button" value="9" /></td><td><input class="btn math" type="button" value="-" /></td></tr><tr><td><input class="btn" type="button" value="4" /></td><td><input class="btn" type="button" value="5" /></td><td><input class="btn" type="button" value="6" /></td><td><input class="btn math" type="button" value=" +" /></td></tr><tr><td><input class="btn" type="button" value="1" /></td><td><input class="btn" type="button" value="2" /></td><td><input class="btn" type="button" value="3" /></td><td rowspan="2"><inputstyle="height: 100px"class="btn operator"type="button"value="="/></td></tr><tr><td colspan="2"><input style="width:100px" class="btn" type="button" value="0" /></td><td><input class="btn" type="button" value="." /></td></tr></table>
In above html code we used table and input type button to make keys and passed numbers , math operator as an value


🔗Let’s add styling into ui 🎨
Basic styling
css{margin: 0;padding: 0;}body {background-color: #5ba5db87;font-family: "Red Hat Display", sans-serif;}
CSS to center calculator
css.calculator {position: absolute;top: 50%;left: 50%;transform: translateX(-50%) translateY(-50%);border-radius: 15px;overflow: hidden;}
CSS for screen and screenContent , calculation , result
css.screen {height: 150px;background: #001e34;margin: 20px 20px 20px 20px;margin: auto;}.screenContent {text-align: end;padding: 17px;font-size: 30px;user-select: none;}.calculation {font-size: 12px;color: white;overflow: auto;padding-top: 2rem;}.result {font-size: 2.5rem;padding-top: 1rem;color: #fff;}
CSS For table tr td and button keys , operator keys , math keys
csstable {background-color: #001e34;border-collapse: collapse;}tr,td {border: 0.2px solid black;border-collapse: collapse;}.btn {width: 50px;height: 50px;font-size: 17px;cursor: pointer;border: none;background: #002b4a;color: white;outline: none;}.operator {color: #26b821;font-family: "Fira Sans", sans-serif;}.math {color: #9a80e4;font-family: "Fira Sans", sans-serif;}
CSS for button hover
cssinput[type="button"]:hover {background-color: #ffa800;color: #fff;transition: all 0.5s linear;}
Preview
As you can see above ui is done Let’s make it working using javascript
🔗Let’s start building feature for calculator
What we really wanted
- Get the value of number and math key when button is clicked and print into calculation text screen
- Clear calculation on click clear button
- Remove last character from calculation on click ( <br ) back button
- Return output of calculation on click ( = ) equal button
Let’s create features one by one for everything
But before that let’s target element where we want to return calculation text and result text


jsconst result = document.getElementById("resultText");const calculation = document.getElementById("calculationText");
In above javascript code we targeted elements by id and assigned into variables ( we’ll use these variables later in tutorial to print calculation text and result text )
Now let’s build features
- Get the value of number and math key when button is clicked and print into calculation text screen
We can use onclick javascript method to achieve this
jsfunction insert(num) {console.log(num);}
In above javascript code we created insert function and passed num as a parameter now we can call this function onclick button and pass key value as an arguments
Let’s call this function on click key button and pass key value as an arguments
Update input button as follows
html<table><tr><td><input class="btn operator" type="button" id="clear" value="C" /></td><td><input class="btn operator" type="button" id="back" value="<" /></td><td><input class="btn math" type="button" onclick="insert('/')" value="/" /></td><td><input class="btn math" type="button" onclick="insert('*')" value="x" /></td></tr><tr><td><input class="btn" type="button" onclick="insert(7)" value="7" /></td><td><input class="btn" type="button" onclick="insert(8)" value="8" /></td><td><input class="btn" type="button" onclick="insert(9)" value="9" /></td><td><input class="btn math" type="button" onclick="insert('-')" value="-" /></td></tr><tr><td><input class="btn" type="button" onclick="insert(4)" value="4" /></td><td><input class="btn" type="button" onclick="insert(5)" value="5" /></td><td><input class="btn" type="button" onclick="insert(6)" value="6" /></td><td><input class="btn math" type="button" onclick="insert('+')" value="+" /></td></tr><tr><td><input class="btn" type="button" onclick="insert(1)" value="1" /></td><td><input class="btn" type="button" onclick="insert(2)" value="2" /></td><td><input class="btn" type="button" onclick="insert(3)" value="3" /></td><td rowspan="2"><inputstyle="height: 100px"class="btn operator"type="button"id="equal"value="="/></td></tr><tr><td colspan="2"><inputstyle="width:100px"class="btn"type="button"onclick="insert(0)"value="0"/></td><td><input class="btn" type="button" onclick="insert('.')" value="." /></td></tr></table>
In above html code we called insert function only on number, math keys and passed key value as an arguments
Now if we click on any key button we able to get that key value ( for demo purpose we printing in console log ) see below
As you can see now we can able to print key value of button but we want to print these values in calculation screen not in console log
Did you remember at beginning building features we targeted elements by id and assigned into variables ? no we’ll use these variables to print keys values on screen
Print key values on calculation screen onclick button Update insert function as follows :-
jsfunction insert(num) {calculation.textContent += num;console.log(num);}
In above javascript code we printed num value into calculation screen using textContent and addition assignment operator
- Clear calculation on click clear button
jsdocument.getElementById("clear").addEventListener("click", function () {calculation.textContent = "";result.textContent = 0;});
In above javascript code we targeting clear button by id and assigning a blank value to the calculation and 0 to result on click event listener
- Remove last character from number on click ( < ) back button
jsdocument.getElementById("back").addEventListener("click", function () {var exp = calculation.textContent;calculation.textContent = exp.substring(0, exp.length - 1);});
In above code we targeting back key button by id and assign value of calculation to exp variable then assign calculation by substring exp variable from 0 to (length of exp -1 )
- Return output of calculation on click ( = ) equal button
Finally the main important feature of this calculator We’ll use eval method to evaluate calculation
jsdocument.getElementById("equal").addEventListener("click", function () {var exp = calculation.textContent;result.textContent = eval(exp);calculation.textContent = result.textContent;});
On click event listener targeting equal button by id then
- assigning the calculation to the exp variable (we'll use this variable to evaluates calculation using eval method)
- executing exp variable using the eval method and assigning to the result to result screen
- assigning the output of the result to the calculation to print result to calculation screen too
Congratulation we have successfully created calculator app 🥳

